


Dashboard Update: Target Classroom Fill Rate Monitoring and Team Announcements
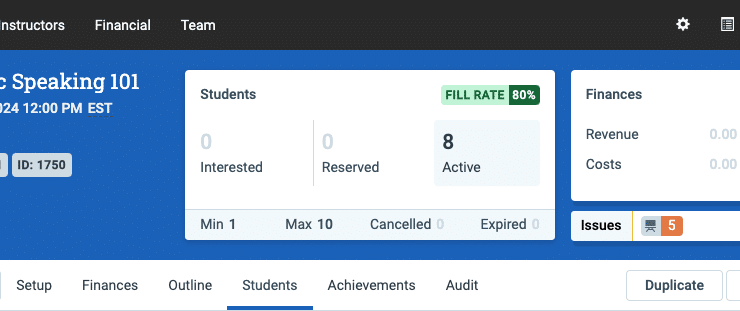
3 minute readWe are improving our dashboard with continuous updates. Recently, we added alerts to the dashboard that surface important issues so you don’t have to go…
Explore our blog, where we share our thoughts about training trends, learning technology, and more.

We are improving our dashboard with continuous updates. Recently, we added alerts to the dashboard that surface important issues so you don’t have to go…
Nobody likes to hunt for problems – particularly folks working to deliver a lot of scheduled training at scale! We’re…
Read more
Siemens Healthineers faced serious challenges in managing an L&D operation with global scope. With training centers around the world delivering…
Read more
What could pharmaceutical trainers achieve if they had 20% more time? Administrate is helping teams at Roche Diagonstics leverage their…
Read more

Read

Read

Read

Read

Read

Read

Read

Read

Read

Read

Read

Read

Read

Read

Read

Read

Read

Read

Read

Read

Read

Read

Read

Read

Read
Join thousands of training leaders around the world who have our content delivered straight to their inbox.